Showing posts with label Entryway. Show all posts

3.24.2017

Entryway Decorating Progress

I wanted to share my latest HomeGoods find that I decided to put in our entryway! 
I stumbled on it about 3 weeks ago, and immediately fell in love.
$400 for this grey, weathered, solid wood piece is a steal! It was labeled as a "TV console" but I knew I could use it in the entryway that I've been struggling to decorate😁
I wasn't totally into the dark, existing hardware which gave it a more "rustic" look, so I switched them out for these gold, glass, tube shaped handles from Hobby Lobby.
...after two broke😕... I decided that this particularly delicate handle, no matter how loose or tight I screwed it in, was probably NOT going to work for this little project. lol #trialanderror 
So... I went back and picked out these much sturdier, more geometric gold knobs for the top potion of the console, and some really cool brassy/gold hinged pulls for the bottom cupboards.

5.10.2016

The Black is Back! - Painted Front Door

I've been a long-time lover of a good, unique colored door. I even created a specific Pinterest board, just for them. My only problem though, is that I have a hard time committing to a really bright, loud, specific color, because I'd rather accent with those shades instead... hence the reason that I ALWAYS opt for the classic black, when it comes to our front entryway door :)
In our last house we hired Justin from Southwest painting to come and spray our door, and he did an amazing job. So naturally, we hired him and his awesome crew again, to fancy up our new houses door!

They tape off the space really well that they're spraying, with a plastic tent-type structure, and then get to work.

7.16.2015

All of the Things and None of the Things + An Office Peek

I found an article the other day on Momastery and it really struck a cord with me. I quickly highlighted and copied parts of it into my notebook on my phone, so I could send it to Cason later.
Within minutes I was crying and laughing all at once, and I knew I had to share it with you too, because as women, I think we all feel these things from time to time.

Excerpt from Glennon @ Mommastery:
Explaining to your Husband how your day was.

"It was the best of times and the worst of times. There were moments when my heart was so full I thought I might explode, and there were other moments when my senses were under such intense assault that I was CERTAIN I’d explode.

I was both lonely and absolutely desperate to be alone. 

I was saturated—just BOMBARDED with touch and then the second I put down the baby, I yearned to smell her sweet skin again.

I was simultaneously bored out of my skull and completely overwhelmed with so much to do.

Today was too much and not enough. It was loud and silent. It was brutal and beautiful. I was at my very best today and then, just a moment later, at my very worst.

Husband—when your day is completely and totally dependent upon the moods and needs and schedules of tiny, messy, beautiful kids, your day is ALL OF THE THINGS and NONE OF THE THINGS, sometimes within the same three minute period.

But I’m not complaining.

This is not a complaint, so don’t try to FIX IT.

4.10.2015

Oops I did it Agaaaaain - Entryway Painting & Inspiration!


Guys, I had to! I just LOVE white so much! And I want some sort of awesome molding treatment in the entryway and down the hall. It already looks brighter with the primer we have so far. 

PAINT COLOR: High Hide White from Sherwin Williams in a satin finish.

Here are my inspiration pics for what I'm thinking :) 

11.19.2013

I Dream of Entryways + Elements that can Help your Entryway Rock

My eBay Collections were curated as part of a sponsored collaboration with eBay

Can I just say how much I love a great entryway in a home?
It's actually one of those super-important things on my list that will HAVE to be considered if we ever move into another house. No entryway - NO WAY!
Don't get me wrong, I'm still in love with our entryway makeover, and adore our little nook and all the new design elements and character this space has now...

...but ideally, I'd like to have a mudroom, in an actual MUDROOM someday, and my entryway to just have it's own identity. ha! That being said, when you live in a smaller space, but you still want the luxuries that a bigger, roomier house has to offer, then you make compromises. Between a makeshift mudroom in our entryway, or no mudroom at all?.. I choose the first option; occasional coats and backpacks on the ground and all :)

In my wildest (yet still sorta realistic dreams) I'd LOVE an entryway similar to this one below. Breathtaking large front door with plenty of windows for light to pour through, overly wide in size, spacious, airy, encased in white chunky molding, a statement light that knocks your socks off, a fab entryway table, and even a small spot to sit more than one person, so that you can invite people inside... without having to always "invite them ALL the way inside." If you know what I mean.
 AKA: Welcome to my messy living room, dirty kitchen and unmade beds down the hallway. bleeeh.

Now if we're goin' full dreamer here, my all-time, would-die-to-have home entryway, would look JUST like this...

9.15.2013

Entryway Table Decor

Just like I promise, I'm back with some entryway decor I wanted to show you, that we added to our little $12 table redo. Most of it was just gathered from other areas of the house, or past projects we worked on, but a few things are new too.
Entryway Table Decor - thehouseofsmiths.com

First up, a couple of questions answered:
For those of you who have asked, our silvery-gold sunburst mirror was one that we picked up from a Joss & Main sale a few months back. If I remember right it ran us about $140 or so I think. I'd seen mirrors like these a lot pricier, so I was thrilled when I spotted this price tag, but then realized when it came in the mail that the reason it was a bit less, was because it's not metal, it's actually made out of a lighter, plasticy type material that's just painted to look like it has a metallic finish. To be honest it hasn't bothered me one bit, and I sort of liked that it didn't weigh a million pounds when we went to hang it up.

The next question that we keep getting is about our outlet covers. Man, if I had a choice we just wouldn't have outlets in the middle of walls at all, but if we must, we must. It seems like a frivolous thing, but really, changing out your outlet covers to new, brighter, more stylized ones will really kick your space up a notch for a small price. (ignore the bright blue theme park stamp on Cason's hand. ha!)

We first stumbled upon these classy, Allen and Roth wood wall plates when we were redoing our kitchen and adding the wood planked wall in. Once our cabinets and wall were painted bright white, we realized how yellow our original outlet covers had become, so we needed new ones. Cason found these and we've been slowly replacing our old fixtures with them ever since.

The stack of old, colorful books were bought at a flea market this past year for a few dollars each and the large "S" was found at HomeGoods and then spray painted white.

9.08.2013

Table Redo for $12 - Holla! + My Best Tips on How to Spray Paint Furniture

Over the years I've gotten LOTS of emails with questions about this little' ol table in our entryway. I have to agree with almost everyone in saying that it's pretty much the PERFECT size for an entryway like mine. Measuring at around 56 inches wide, 35 inches tall and 11 inch wide, this lovely lady has been with us through thick and thin, and will probably always have a place in our home, one way color or another.
:)
How to Spray Paint Furniture - Entryway Table Redo - thehouseofsmiths.com

You know how you have something for SO long that you sometimes forget where you even got it? Well, that's happened to me once or twice with this piece, actually. I finally asked Cason where we snagged this, and he reminded me that it was from a friend who was moving about 8 years ago. He recalls that we paid $20 for it. This whole time I was thinking we picked it up at our local thrift store.
Yikes, bad memory. ha!

You can read all about our table redo, when we painted this baby white, but just so you know, it originally started out in natural wood, then went deep red with a black stain, transitioned into white with a glaze and now, we're goin' a pretty shade of green... well, Jade, to be exact.
:)
Entry way table life - thehouseofsmiths.com

When we painted this table white we rolled it with latex paint and a non-textured roller. This time, since I've been diggin' the whole sprayin' scene lately, I thought we'd try spray painting this table instead, and along the way share some tips and tricks with all of you.

First, we removed the hardware from the drawers and doors. I always put mine in a plastic bag, to make sure they all stay together.
Furniture revamp prep - thehouseofsmiths.com

As you can see, our table has been beaten up, and stained (due to a plant that leaked some water while we were away on a 3 day long vacation). No worries though, I just took a 100 grit sandpaper to the top of it, and evened everything out. The sanding got rid of most of the yellow water stains, and a few of the nicks and scratches... but any deep gouges from kids or decor, I didn't really stress over. It gives the table character and a natural "distressed" look that I sort of like.

Because our table wasn't finished with a lacquer or super-shiny paint, I didn't have to worry about reaaaally sanding hard-core. Just a light once-over was enough. Then to make sure I got rid of any dust, I used a dry cloth to wipe any unwanted dust particles away.

In the Kyrlon 24 in 24 challenge, we used this Jade color on a bathroom vanity redo, and I LOVED it! Since then I've been wanting to get my hands on some so I could spray something in my own house this shade. One coat brings out the greens in this color, two & three deepens it a LOT more and then you see all the blues that are combined as well. LOVE it!

Jade satin Krylon spray paint - thehouseofsmiths.com

8.20.2013

DIY Orb Chandelier Tutorial - Zgallerie Eclipse Knockoff

Jen from Tatertots & Jello and I have been friends for about as long as we've both been blogging. I remember the first time we met... and ironically, it was over a lighting fixture exchange!
Who knew that over 3 years later we'd become the best of blogging buddies and life-long friends (???) It's so crazy how life works, isn't it?
Shelley and Jen utah bloggers

From painted chevron rugs to Valentines day subway art and even a little help with a bedroom makeover (soon to be revealed on Jen's blog), I've had a BLAST working with this super-talented-creative-mega-mind friend of mine, and hope we NEVER stop collaborating on awesome projects together.

All that being said, about 2 months ago Jen and I were laying around in a hotel room, during a blogging event, talking about things we wanted to still get done in our homes, and we both mentioned how MUCH we really wanted one of those cool orb chandelier lights that we kept seeing around in all the high-end stores. If we saved, we knew we could probably afford one, but neither one of us felt like spending over $500, or DOUBLE THAT on a single light fixture was really the best place to put all of our hard earned cash. 
So what do you do when you can't find something that you WANT, at the price you NEED it to be at? You MAKE IT of course!DIY Orb chandelier tutorial - Zgallerie light knock off - houseofsmiths

I definitely have to give Jen all the credit when it comes to material choices and basic construction of this awesome DIY orb chandelier.
PS: This is my "things are gettin' serious here" face.  ack!

Jen and her smarty-pants hubby Jeff figured out how to get the orb shape we needed, and then once we had the basic idea down, Cason and I were off to figure out how to construct our own... in a smaller version than Jen's with a little bit of a different twist.
DIY Orb chandelier tutorial - Zgallerie light knock off - houseofsmiths

Here's how we did it:
We bought our chandelier base from Home Depot. It's called the Charleston 6 light chandelier and it was $95.00. (Jen's was a bit larger and ran about $120.00)
DIY Orb chandelier tutorial - Zgallerie light knock off - houseofsmiths

2.26.2012

Project: Entryway Closet Makeover - The Reveal!

Drum roll please..... It's finally done!
Our once small, useless, overly-cluttered-builder-grade coat closet has officially turned into a functional, prettier, more organized entryway nook!

If you've missed out on our Entryway Closet Makeover journey, you can check out parts 1 & 2 first, to see how this crazy-awesomeness came about!

2.06.2012

Project Entryway Closet Makeover: Part 2 - Design

Yay! We're back with Part 2 of the "Project Entryway Closet Makeover!"

I think I should clear something up first... This closet makeover, to-this-day STILL isn't totally done. So when everyone sends me emails asking to see the finished product ASAP... well, I don't have much to show you yet, because I'm still working on all the finishing touches! I PROMISE that nobody wants to see it completely D.O.N.E more then ME! lol 

So that being said, here is Part 2, the designing stage of our closet. Part 3 will be our LAST stage for this project so don't worry, I'm not just stringing you along. ha! I literally will be searching for the perfect pillows and accessories to finish off the space tomorrow (wish me luck). And once those are found... 
YOU SHALL HAVE YOUR FINISHED ENTRYWAY NOOK!!!
(said with one fist in the air and in my best Mel Gibson, Brave Heart impersonation)
:)

Okay, so let's get this party started...
You know by now that pretty much everything around here starts with a sketch, and this project was no different. We knew that we wanted this space to serve a few different functions.

1. Beauty (visual interest and more open space)
2. Storage (for coats, gloves, hats, boots, batteries, light bulbs, extension cords, etc...)
3. Seating (a place to relax, take off/put on your shoes, talk on the phone, etc...)


So once we knocked down our walls and measured the space that we had available, we started working up our design plan. First things first, rip up the small patch of carpet and build a platform for the bottom of our nook, along with a bench above it.
We did this by building sort of a grid with 2x4's and 3 inch screws, like below.

1.24.2012

Project Entryway Closet Makeover: Part 1 - Demo

A few months back as I was frantically trying to get the kids ready for school, something happened.
...I fell.
Yup! Wanna know where?...Believe it or not, right INTO my entryway closet. Yes, you read that right. As I was shuffling through the collection of coats and backpacks on the floor (because that's where they live, duh) of my extremely cluttered entryway closet, and was simultaneously fighting with my vacuum hose and elbowing my way through random empty hangers... I lost my balance on a ziplock bag full of batteries and FELL... right onto the floor in the closet.
(aka: the dark pit of clutter-prone despair)

From the outside, this closet doesn't seem to appear as much of a threat or pit... just a regular ol' coat closet.

And even in these next pictures you can see that it doesn't look so bad (because I actually picked it up, for the photo) but let me assure you, this random, space-sucking-dumping-ground has definitely been an issue for us in this house! It never stays clean, there is virtually no storage, and the huge 36 inch door either has to be completely open or shut to allow for anyone to even pass through the already small entryway.

So, on with my story... while I was sitting on the ground in our embarrassingly messy closet and coats continued to tumble down on top of me, I realized something...
This closet was actually really HUGE!
Literally it was just a big open cavity of space that had been installed under this decorative garden shelf and it was TOTALLY being wasted! I then stood up and starting taking inventory of how deep the closet was on each side and even knocked on the walls a bit to quickly do a "is there anything really behind here" test and surprisingly, nothing seemed to be in my way from making this closet a LOT more functional!

Once I realized this fact, I pretty much did what any normal DIY girl would do, who just realized that there was an un-decorated space in her house that COULD be better organized and utilized...
I started ripping everything out, throwing it on the floor and grabbed my hammer.

4.01.2011

Using Mirrors to Create More Light and Fill Spaces


We all know that I'm obsessed with natural light... right.
Well, besides windows, what's the best way to reflect light???

If you said Mirrors... you're RIGHT!
We have a big framed one in our entry way...

and another, beveled version not too far away, hanging over our stairs

8.13.2010

DIY Tin Accent Sign Tutorial


This little project goes with another picture window project I'm finishing up.
But I thought it might be helpful to give this cute little tin sign it's own quick tutorial post :)


8.10.2010

IKEA Rug


Have you had a chance to drool on this book yet?


Please take a moment to LOVE... ALL of THIS...

7.28.2010

Fat Quarter Pillow Tutorial


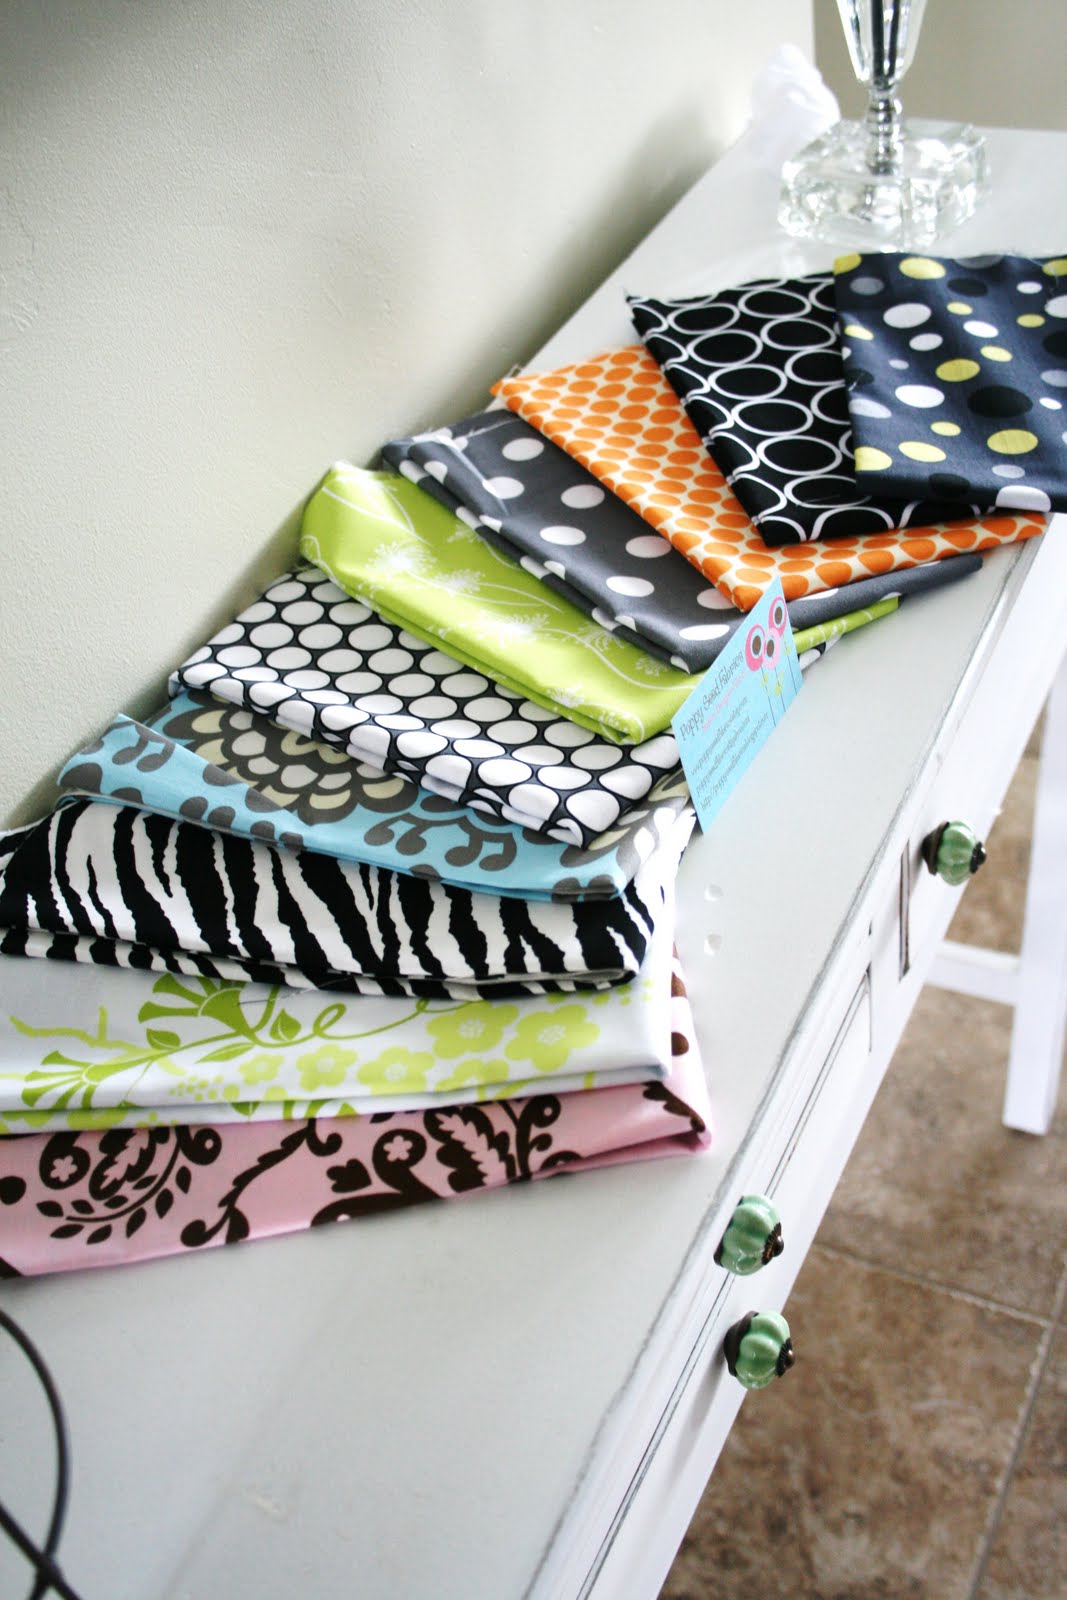
Okay, so first of all, I have to say, that I get all my cute fabric from Kimberly over at
Poppy Seed Fabrics.
LOVE her stuff :)
So this is where my fat quarters all came from. 10 for $20.  Can't beat THAT! :)
I've been wanting to incorporate some more grey into out entryway, and I thought that a cute polka dot pillow for our little black entryway bench would be JUST the touch I was looking for!

Enter in, my cute fat quarters from Miss Kimberly :)
I knew I wanted to do some kind of embelishment on my fat quarter pillow, so that's where I started.
Here's what you need...

6.14.2010

Monogrammed Fabric Thrift Store Frame Revamp


I'm totally thrilled to introduce you to my newest sponsor!
Kimberly from Poppy Seed Fabrics!
You guys are just going to DIE when you see everything she's got in her shop!
Okay so...
I couldn't help myself!  I ordered her "custom fat quarter bundle" for myself.
You get 10 fat quarters of your choice for only $20 bucks! Whoo hoo!

When my package came, it was like Christmas morning. I was SO excited!
I mean look at all this AWESOME fabric goodness!
(((sigh)))
lol.
I knew exactly what I had in mind for my first project, so I got to work!

6.03.2010

Hallway/Entryway Before & After


Okay folks... here it is!  finally, right!? jeesh :)
The big picture...  With the entire entryway and hallway, together!
It's so nice to have this area... done presentable! :)
I'm thrilled with how things came together!


5.07.2010

Thrifty Picture Frame Craft & Other Finds


For our young womans church activity a few nights ago, we made some personalized picture frames for our Mom's for Mother's Day!
I don't think I'm actually going to give this one to my Mom, but we had lots of extra unfinished $1 frames from Michaels, so I jumped in on the fun, and made this perfectly purple picture frame!
So nice to do a crafty "small" project. LOL.


3.04.2010

Before and After Entryway

{The Tale of Two Entryways}
K... no tale really... but
Remember when....

I had en entryway like this?


Entryway Chandelier Revamp

{Entryway Chandelier Revamp}
About 3 or so months ago I met this sassy chick! One of my MOST favorite bloggers here in Utah, for SURE!  Jen from Tatertots and Jello is so fun, talented and sweet.
Jen was in need of some vinyl, for her daughters room, and I was in need of her old kitchen chandelier... lol... that I noticed in a recent post, she had ditched for a more modern looking fixture, to match her style.
So... a-swapin' we went!


This is how the chandy looked when I got it.
It had some shades on it too... just kind of some papery ones that came with the fixture, when Jen bought it.
I knew exactly where this pretty lil' thing was going... once I had it in possession........ one word...

Entryway!


ShareThis