


I've had a LOT of questions lately about Aubrielle's Board and Batten wall treatment, in her room that we did...

So I thought I should snap a couple of pictures and give you some more info, to hopefully clear a few things up...

Here is what the board looks like... in it's "plain Jane" state.
This is a cut down version, but it comes in a 14 ft. long piece I believe.
NOT ALL LOWE'S stock this item. But ours, in West Valley does!
They are about $5.00 for each 14 foot piece, and located in the very back right corner of the store, on the floor, next to the outdoor siding stuff.
You can special order them though. They are actually the wood that is used to make closet supports as well... my Dad told me :)
You know... those solid 3 inch pieces that hold up the shelves and sometimes make "L" brackets to support the middle piece of a larger section of shelving?


On ONE side of the board there is a ROUNDED edge, and a straight edge.

The rounded edge is great if you are finishing off with this board.
But if you want to do board and batten, then just FLIP the board to the other side, and you have TWO straight edges.
This is pretty important, because you don't want to have board and batten showing with only ONE rounded edge on ONE side of the board. lol.
But if it's against the wall, then you can't even tell!

So here's how we did OUR board and batten:

We cut these boards at 73 inches tall, and then figured out the spacing between them at 5 1/4 inches.
To do this, I actually slapped a piece of masking tape on the back of each board to hold it in place while we moved them around and figured out the spacing. They kinda leaned up against the base board too, so that was a lot of help.
Might be a little ghetto, but It worked like a charm! lol.

Once we had them where we wanted them... We
put a little liquid nails on the backs... shot a few nails in the top and bottoms... and finished off the tops of the boards with a 4 inch piece of regular primed wood.
This was cheap too, at Lowes. Only about $8 or $10 bucks, and it was already primed! YES!

Then I did LOTS of puttying and sanding...

Cason filled it all up with paintable caulk and then I did 2 coats of primer and 2 coats of Semi-gloss white.
(just the regular stuff, right out of the can. I just had the lady at the paint counter shake it for me)

The last question I get asked... probably the MOST, is ...
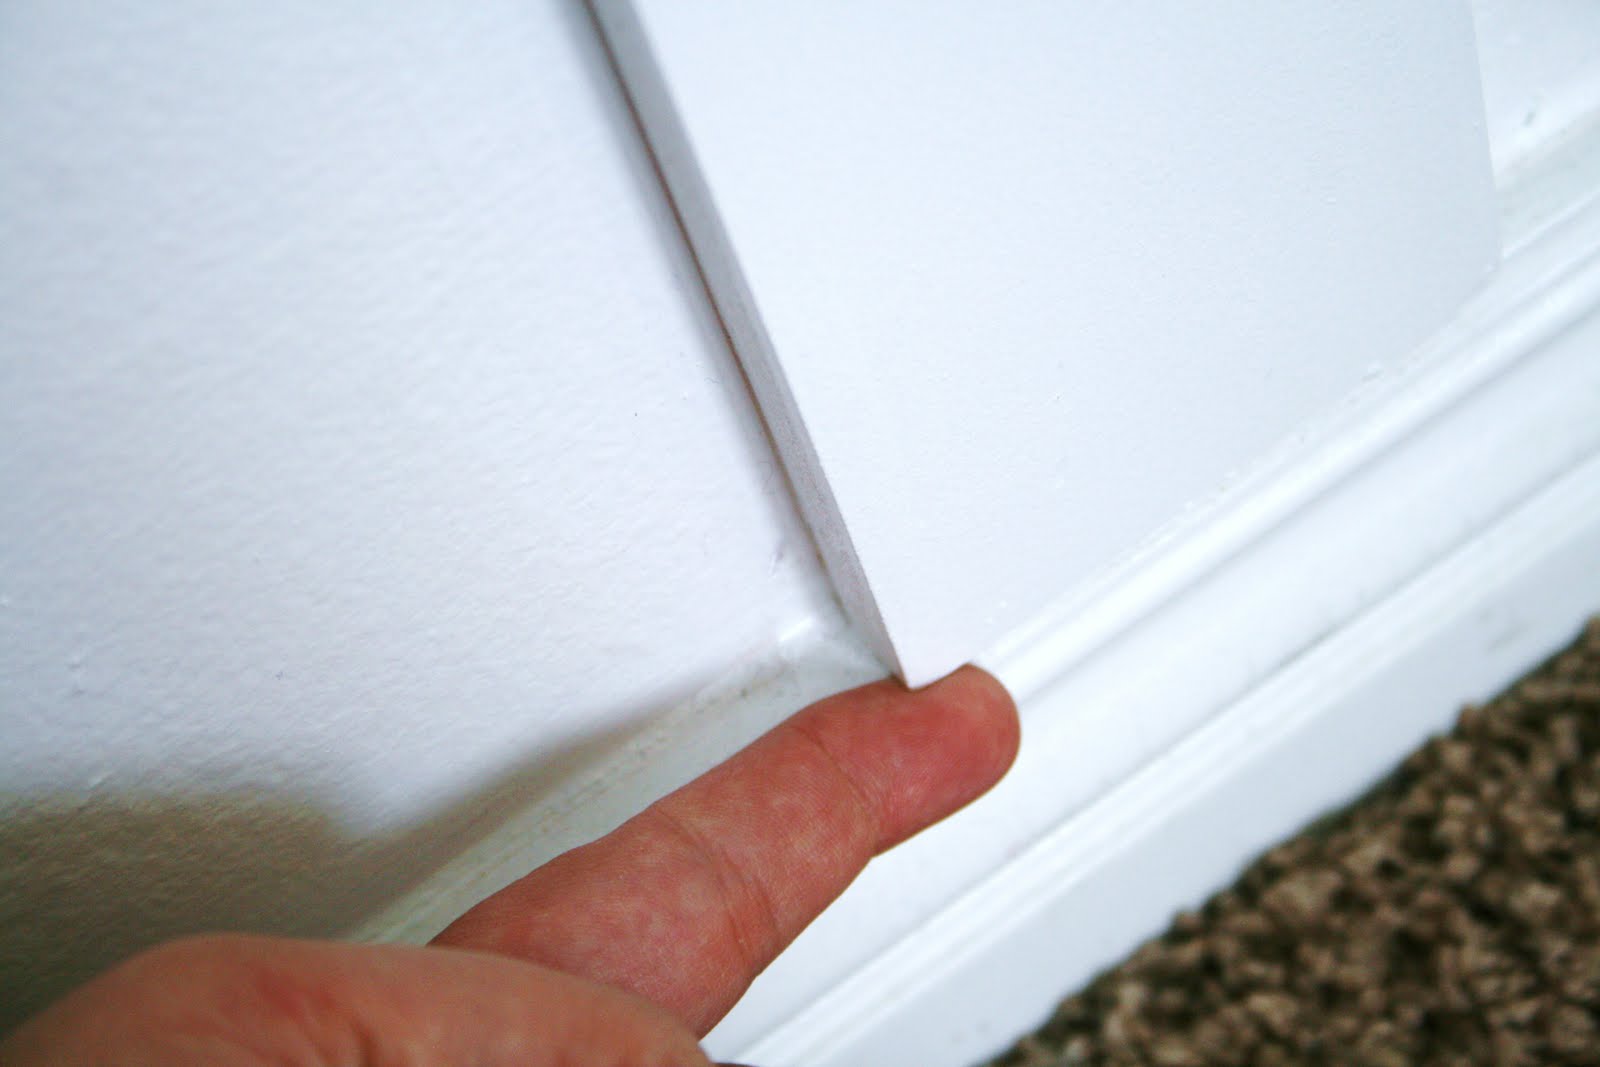
"My board hangs off the edge of our base board, did yours? What did you do?"
Well, Mine looks like this.

Our baseboards have a pretty thick ledge... ALMOST the same size as the board was, so we didn't feel the need to rip them off, just to make them fit EXACTLY.
details, details, details...blah, blah, blah... lol.
You can kinda see here, when I put my finger under, there is about an eighth of an inch over hang.
Seriously... you can't even TELL once everything is painted all white.
I HAVE seen it where people, who have smaller baseboards and STILL don't want to take them up,
will shave off the ends of each board, till they meet up with the base.
Like this.

(click to enlarge)
Once they've painted it... it looks great!
I think I covered it all. This really was SUCH a simple treatment for this space.
And great for first timers who want to tackle a DIY project.
I love it so much! It totally gives the room a "pottery barn" feel. :)
images from PotteryBarn.com
...Try it! You'll like it!...
(okay... give me a break, my kids are watching "Yo Gabba Gabba" right now... and if you don't know what that is... then forget this italicized comment and be glad you are out of the loop with weird kid shows. LOL)


Very Cute!!! yeah...I TOTALLY know ALL kids shows!! ;)
ReplyDeleteGosh I had a whole comment written out and it got erased ok!
ReplyDeleteSo here I go again... This is another reason I want to own a house!!! GAH! I love the way it turned out yall did excellent!
Does the back of your husbands shirt say STAB!? hahaha
I think that was it...
very cute room. i never would have thought to do that but it came out great!
ReplyDeletehttp://schnellecouture.blogspot.com/
the one picture I wanna see isn't loading for me...booo, I wanted to see the smaller base board pic so I could do this to my house
ReplyDeleteI love board and batten and have been begging my hubby to put it up for YEARS...yep, like 5 of them! Guess what hasn't gotten done? I can't wait to move and put it in in the new house. Thanks for the tutorial!
ReplyDeleteI want to do board an batten in my master room sooo bad! maybe once i finish getting moved in i can get to work on that :D thanks for the tutorial!
ReplyDeleteThanks for that tutorial. I love how that looks. I want to use that in my laundry and can use a the help I can get.
ReplyDeleteBrooke
We just torn out a mud room closet and I wanted to do bead board, then decided on board and batten. Thanks for the tutorial. This will be so much easier than I planned. I might get carried away and do every room in the house. yikes! Thanks for your inspirations!
ReplyDeleteWe just tore out a closet in our mudroom and I was going to do beadboard, but the more I thought about it, I wanted to do a board and batten look, but didn't know what to do. Thanks so much for the tutorial. And thanks for all your inspirations.
ReplyDeleteYEAH for Yo Gabba Gabba! Just wanted to let you know that my hubby runs a landscaping company here in the Valley. He works in Daybreak often and LOVES your dad's yard! I read the post from a little while back, and just wanted to tell you that he thinks its AMAZING also!
ReplyDeleteThe photo of the smaller baseboard won't load for me either :_( . Shelley, would you mind inserting the photo again, please? I bet it's more like my baseboards!
ReplyDeleteOne quick question-- how thick were your boards? 1/4" or 1/2"?
Thanks again for your awesome blog!
Love this project...could you tell me where you got the adorable polka-dot quilt on her bed? Looking for something similiar. Thanks!
ReplyDeleteWhat a wonderful project. I like it so much. It came out very good. Thank you for sharing this. Have a great day!
ReplyDeleteI tried it! I liked it! No, actually I LOVE how my hall turned out! Thank you so much for this tutorial. It was invaluable during my project and you pretty much rock. I linked this post in my blog. THANK YOU!
ReplyDeletehttp://artymcgoo.blogspot.com/2010/09/over-haul-on-hall.html
So, I noticed that your walls do not have much 'texture'. Our walls in my house have a lot of that 'texture' to it and they are very bumpy. Would this treatment look ok with the smooth boards and the rough texture of the walls?
ReplyDeleteLove this and want to do it in my house. But I have textured walls what would you suggest I do putty the while wall first? I am a little lost
ReplyDeleteLooks fantabulous!!
ReplyDelete(and I read the "try it! you'll like it!" in a yo gabba gabba song voice before I even read your explanation...What have you done to us DJ Lance??)
Looks fantabulous!!
ReplyDelete(and I read the "try it! you'll like it!" in a yo gabba gabba song voice before I even read your explanation...What have you done to us DJ Lance??)
This is a great post with interesting information, I really enjoyed reading it. I must say that the subject matter is well discussed and I will definitely coming back for more. I'm gonna bookmark and share this to my friends. Thank you for this!
ReplyDeleteThis is a great post with interesting information, I really enjoyed reading it. I must say that the subject matter is well discussed and I will definitely coming back for more. I'm gonna bookmark and share this to my friends. Thank you for this!
ReplyDeleteyou might also want to check out elitecreteaustralia(dot)com(dot)au for more photos and more designs.
I love this look and will do it as soon as I move into a house (condo is for sale, wish me luck!). An idea for the overhang of the battens and baseboard is to carefully remove rip the baseboard and install a filler piece behind it and then reattach the baseboard. I'm anal/detailed like that :)
ReplyDeleteAs for textured walls, you could install a thin piece of the stuff ikea uses for drawer bottoms (I think it comes in 4' x 8' sheets). The seams might make the placement of the battens a bit trickier since you would want to cover them up.
hahaha. before i even read about the yo gabba gabba in italics i still read it the way you intended. my daughter watches yo gabba gabba too, their sayings are always running through my head. like when im running lots of errands in a day "run, run, run. its fun, fun fun." haha all the time!
ReplyDelete