


After a bit of "lamp shade covering issues"... I've finally gotten down to work and FINISHED my thrift store lamp shade, re-do!
My first issue that I had, before, was that I chose a fabric that had a straight pattern.

Although I LOVED this fabric,...this made it VERY difficult, with a cone shaped shade, to get the pattern straight.
Drum Shade, would be perfect for this print!
So...off I went to find some fabric that had a pattern that didn't need to necessarily be perfectly lined up.
ANOTHER concern I had, when redoing this shade was...
"What if I want to change it later? Will I have to RIP apart the shade, to get new fabric over it?"
That sounds like a lot of work.
QUE smart Hubby:
"Why don't you just make a skirt type cover to just slide OVER it?
Then you can switch it out if you want."
GENIUS!!!!!!!!!
Why hadn't I SEEN or thought of this before?
oh how i love this creative man :)
So... Here's how I did it.

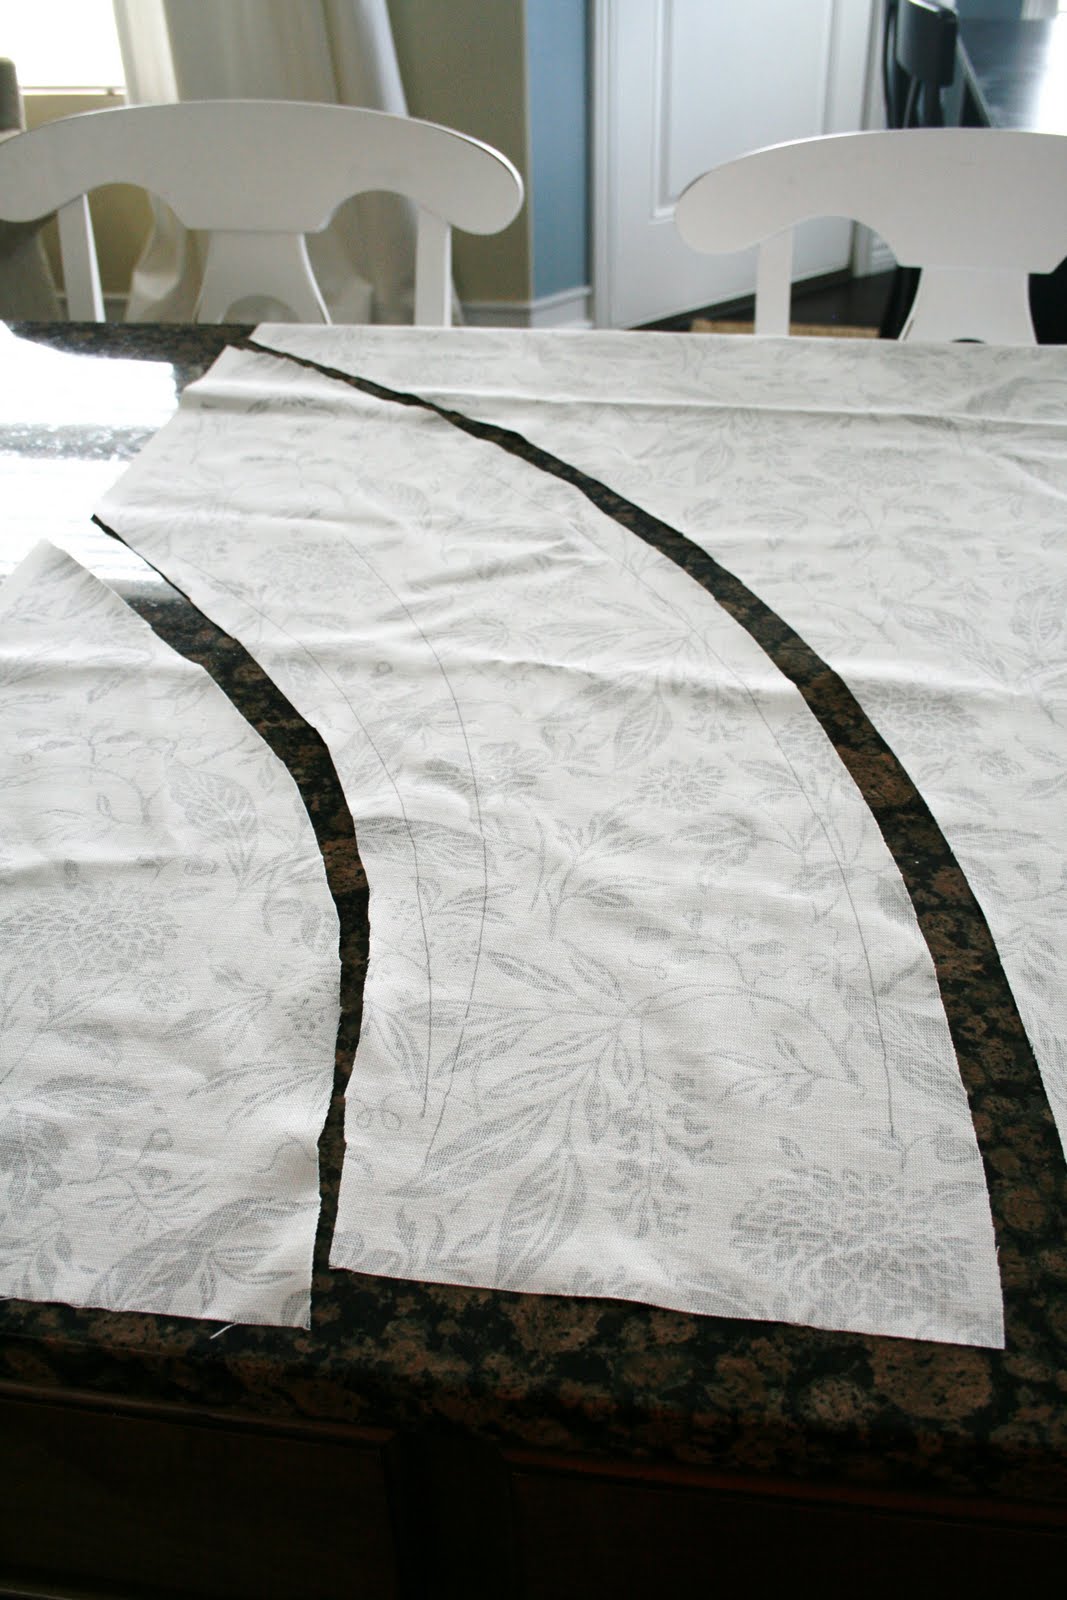
Started from the seam that was already in the lamp, and rolled it till I got to the seam again.
(hope this makes sense)
(it's the top and bottom line... the middle one is a mess up... lol)

Then I cut the tracing out... leaving an additional inch on all sides, for sewing.
Rolled the shade in the fabric... to make sure the fit was good...
"IT'S GOOD!"
(imagine a sports radio announcer voice here)

Then I sewed a seam along the top of the pattern... Rolled the shade back in the fabric
(turned inside out)... and pinned up the middle... like so.
(do you see the seam at the bottom?)


Then I sewed this middle up ... and cut off the extra fabric on the edge.
This is what it looks like flipped right-side out.

Slipped it back over the shade...

And made a tiny mark where I was going to sew the bottom seem.
(I tried to do a light mark in RED, so you could see it... but it's still hard to see. lol, sorry)

Then I sewed a seam along the red mark...

K... Slip cover finished!...
Now...I took some twill tape (you can use black ribbon of any kind, too) and glued it along the top of the shade, where people can see it.

This part IS more permanent, but I figured, I would always use fabric that had some black in it,
so pick a color of ribbon you can use with multiple slip covers

glued it along the top edge, and then pushed it under with a bit of glue as well.

So it looks like this.
I didn't even bother with the bottom, because it will be covered.
(please don't mind the sewing mess in the background. lol)

Slip the cover over the shade...

and TA-DA!
Finished!

I also sewed a simple white cord cover, since the cord was an ugly dark cream color.

And there you have it! An interchangeable lamp shade cover!
You could change this out with the seasons or holidays!
I love it on this little table in the entryway.
I think I might give it a boost with some kinda of cute crate or books or something, but till then...
it's sittin' pretty, right here :)


Very cute! Where did you get that first fabric? I have been trying to find something like that, but have had no luck.
ReplyDeleteI love this! Great idea!
ReplyDeleteLove the lamp shade idea! It turned out great. Darling fabric, Where did you get it? I would love to find some.
ReplyDeleteGreat idea! I have a thrift store lamp to redo as well and I love the fabric you used. Thanks for the tutorial :-) The whole thing looks beautiful.
ReplyDelete-Desiree
Very pretty...
ReplyDeleteGENIUS! Seriously, I can't believe I haven't seen this before. Way to go!
ReplyDeleteThat is absolutely darling. I love that fabric.
ReplyDeleteSo chic.
Brooke
yep, works perfect! i did this a year or so ago or two drum shaped lampshades. so easy and now they look so much better. thanks for sharing :)
ReplyDeleteoh how i wish i could sew now.
ReplyDeletevery cute. i started to recover a lampshade in a super cute black and white alphabet fabric last week and i screwed it up sooooo baaaad.
Yours is darling! love the interchangeable idea!
rachelle
Looks simply fabulous! I am so impressed with how you've taught yourself to sew. Maybe I'll take that leap someday. :)
ReplyDeleteWhat a perfect idea! Love it :) I loved the fabric w/ the yellow!! So pretty..
ReplyDeleteThis is adorable. I love the fabric you chose.
ReplyDeleteThanks for linking up to Saturday is Crafty Day!
Laura @ along for the ride
VERY cute and clever and I like that it is not a permanent fix, but a true "slip" cover! Love the black and white fabric, too, it is gorgeous.
ReplyDeleteWow. I'm impressed. With you AND your hubby! :)
ReplyDeleteWow, he IS a genius! I never woulda thought of that!
ReplyDeleteGreat project! I love the idea of making a slipcover for a shade. Thanks for sharing!!
ReplyDeleteThanks so much for posting! I have two odd sized lampshades - one a cone and one square - that have gotten torn (toddler hands playing .....) and I have been trying and trying to figure out how to recover them!
ReplyDeleteThanks!!!!!!
Great idea! You can dress your lamp whenever you want!
ReplyDeleteThanks so much for the instructions... I have two lamp shades that I wanted to cover and your directions was such a help!
ReplyDeleteFollowing from TTJ.....
Sandy
http://thewondersofdoing.blogspot.com/
Hi there! spotted this from Along for the Ride...
ReplyDeleteSuper cute slip cover for your lamp! thanks : )
soooo beautiful!!! I am in love with your decorating!! Maybe one of these weekends I need to meet you in SLC so we can go thrift store shopping together and I can learn your secrets ;)
ReplyDeletePure genius!
ReplyDeleteAbsolutely gorgeous!!! Your man deserves a huge smooch for that one! Tell him I am impressed (not that he knows me!) -love the slip cover, and wanted to mention that I have spray painted many a lamp cord to match the table or wall so it doesn't show - it works great!
ReplyDeleteGreat job! Thanks for linking up to Home is Where My Story Begins! Hope you'll come back next week too.
ReplyDeleteBecca
I love that you can change it out as a slipcover shade. That's genius!
ReplyDeleteUm, love, love, love! I just recovered my patio chairs in the reverse of that fabric.
ReplyDeleteI LOVE that fabric! What a great idea!
ReplyDeleteThat is completely stunning. Well done my friend.
ReplyDeleteYou are a GENIUS! I was just looking at lampshades this weekend...wow...hello may I apply for a line of credit to buy some new shades?!
ReplyDeleteMaking some slipcovers will be a great idea and SOOO much cheaper!
I also love the cord cover. Who ever made my black and white lamps used a BROWN cord!?! Dude! Think it's spray paintable? They have plastic spray paint...hummm I'll test it out with the red and yellow we used to redo the kids outdoor toys...if it works maybe they make a black! :)
Honey
I love this idea! I wish I'd discovered it sooner! I linked back to this post and I'd love it if you'd visit my blog! Thanks for all of your inspiration!
ReplyDeletehttp://mamawithadashofdiydrama.blogspot.com/2011/10/school-project-and-lamp-updates.html
I love this idea. Thank you for the tutorial.
ReplyDeleteBtw...did you notice that your last name is spelled wrong on the first picture of the finished project?
I just happened upon this tutorial on pinterest, which is lucky because I happen to have a hideously ugly lamp that needs help. Thanks! I hope I'm not correcting something you do for a reason, I noticed that you( or your speak to type technology) consistently misspell 'seam' . I thought you might like to know, if you were unaware. I know I would! Happy Blogging!
ReplyDeleteawesome idea! So much easier than gluing it on. I have two lampshades in my living room that are super blah! Sorry to rush off, but I have to go find fabric to redo my lamps! Thanks so much!
ReplyDelete