{Sash-Slip Pillow}

I found this great pillow form for only $5.99 at my local fabric store, and this cute fabric at Hobby Lobby, for 30% off!
I've wanted a pillow for my little black, decorative bench that sits, almost in the entryway, so I knew this would be a great spot for it.

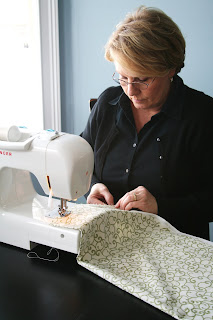
I'm not gonna lie. My Mom pretty much sewed the pillow part for me. It only took her about 10 minutes!
It would have taken me at LEAST an hour! lol.
Thanks Mom!

This is what it looked like after she was done.

I had the coordinating fabric, and planned on making an envelope type cover, that pointed down in a "V" shape, but then decided that a slip on sash would look awesome. AND I could change out the sash if I wanted a different look! Love that!
I'm sure that a lot of you already know all these basics... but for those of you (like me) who need a ... ugheemm... little reminding... here ya go.
I started off by measuring the pillow, to see how long I needed to make the sash.
About 25 inches x 7 inches
Then I ironed the edges of the sash down like this.

And sewed the edges to make the little hem part.
Really easy...


This is the back

Then I brought the two together, so the fabric was inside out, ironed another little edge piece and sewed it shut.

Like this.

So when I turned it right-side out... this is what you get.
Ironed that seam down smooth.
Use the edge of your ironing board like this, instead of laying it flat, because it will crease on the sides... (uh...no... I didn't do that first.............lol)
.
Then slip it on the pillow, like so

Cute right!!!
I love it!
But not done yet.

I found this cute downloadable pattern for these flowers HERE.
Traced these on some cream felt and cut them out.
Like this.

Then I followed the directions on the blog, where I got the template...
Folded each petal of the flower...

and did a few stitches

So it turned out like this.

Here's what the back looks like

And here's a bunch of different sizes completed.

Then I took this fabric brad

And this hole punching tool, and poked a little hole in each flowers' middle, and fed the brad through.


Layered the petals... and got this beauty!
Ooo... Ahh...

This is the back. I flattened the brad down, like so, to keep the flower petals secure.

Figured out where I wanted the flower to go, on the sash...

Took a plain ol' needle and thread, and sewed the flower on... with just a few stitches.

See!

Ta-da!
Easy Peezy!

My fun, easy, sash-slipped pillow!

Try making your own!!!


That's cute! And your mom looks like a sweetie, too. I love the flower. Thanks for the tutorial on this project.
ReplyDeleteI just found your blog thru Tatertots and Jello and I am soooooo glad I did! I am redoing our home and it seems we have very similar taste! I am also working on my daughter's room (she is 2.5) and I got the idea from pottery barn to put a wood grid on the wall. I am glad I found you because I had no idea how much work it was going to be, ha! I am still planning on doing it and can't wait to see your finished room!
ReplyDeleteThis girl is my sister and she amazes me with her creativity everyday. This is SO cute Shelley! Now if I can just get her to come down to AZ and do my nursery for me. ;-)
ReplyDeleteI just love your pillow idea.. I also love he bench it's on!
ReplyDeletesandy
http://thewondersofdoing.blogspot.com/
I love your fabric choices. I always get so overwhelmed at the fabric store and then I can't choose. I love the green! Also, your black bench is really nice.
ReplyDeleteAllison @ http://www.houseofhepworths.com/
What a cute pillow!!!
ReplyDeleteI love it and it looks fairly easy to make. Thanks for showing us how.
Adorable!! It totally pops against the black bench. Thanks for sharing :)
ReplyDeletethat is so stinkin pretty!!! i love how you made the flower. i scrolled through a couple of your other projects and fell in love with your blog... i'm following now :o)
ReplyDeleteI love it! Maybe you already use this-but you probably don't even need to use it-cause you know how to turn on the sewing maching-but..have you ever used liquid stitch? Serioulsy-the best creation on the planet. I made a bunch of pillows for 10's room with it and you can't even tell that they are not sewn! I am going to make one with your sash idea. Too cute! The liquid stitch will make it quicker than quick! As always-love the inspiration! Have a happy tuesday!
ReplyDeleteThe flower totally makes it!
ReplyDeleteI can't get over how cute this is, great job! I love the choice of fabrics too!
ReplyDeleteYou are so talented. I just love it. :) Thanks for linking up! :)
ReplyDeletethank you so much for posting this tutorial!
ReplyDeletei just finished my pillow and i love, love, love it!!!
Oh my goodness. That is ADORABLE! I can't wait to make my own.
ReplyDeleteThanks for the inspiration!
Liz
Loving This Mom Stuff
Thats too cute! I want to know how to make that wreath on the wall behind it!!!!
ReplyDelete